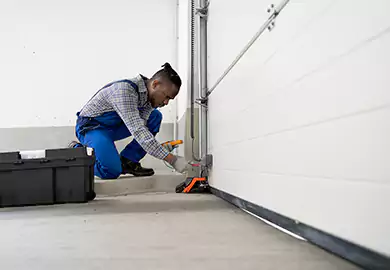
Modern garage door systems require garage door sensors as essential for safety features. They are able to identify obstructions in the garage door's path and stop it from shutting if there’s something in the way, like people, pets, or toys, so it doesn’t accidentally close on them. But if the sensors are misaligned then the garage door may not close, reverse itself unexpectedly, or become stuck.
We'll walk you through the process of realigning the sensors in this article. We'll utilize basic equipment and easy-to-follow instructions so you can realign sensors on your own and ensure the garage door sensors are functioning safely once again.
Why Garage Door Sensor Alignment Matters?
It's helpful to understand the significance of the sensors before we fix them:
- Avoid Mishaps: Sensors prevent the garage door from closing on objects that are in the path, such as humans or animals.
- Protect Your House: A functional garage door ensures the safety of your home.
- Maintenance of the Equipment: Proper alignment reduces the stress on the motor and extends the life of your opener.
Signs of Misaligned Garage Door Sensors
When your sensors are not in alignment, you could observe:
- When the garage door reaches the floor then it instantly reverses.
- The wall button must be held down for the garage door to shut.
- Lights on the sensor are flickering.
- One or both sensors are completely dark.
- The garage door both opens partly and then stops, or it won't close at all.
Common Garage Door Sensor Issues
| Issue | Possible Cause | Solution |
|---|---|---|
| Sensors not lighting up | Unplugged wiring or a lack of power | Reconnect the connections and check the power source. |
| Blinking lights | Misalignment of the sensor | Use a level to realign. |
| Dirty lenses | Cobwebs, dust, or obstruction | Use a gentle cloth to clean the lenses. |
| Garage Door reverses automatically | Misaligned sensors or a blocked beam | Clear the blockage and modify the sensors. |
| One sensor is dark | A malfunctioning sensor or a wiring problem | Fix the wiring or swap out the sensor. |
| Sensors don’t align | A variation in height or an angle | Use a level and adjust the height. |
| Loose brackets | Unalignment caused by vibration | Secure the brackets tightly. |
Tools You’ll Need
You will need a few things in order to properly align garage door sensors:
- Bubble level or laser level
- A screwdriver
- Tape measure
- Sanitized microfiber cloth
- Ladder (if required)
Step-by-Step: How to Align Garage Door Sensors?
1. Inspect for Obstructions
First of all, check the surroundings of the sensors. Get rid of anything that is obstructing the infrared beam, then use a fresh, dry cloth to wipe the lenses to clear of any cobwebs or dust.
2. Check the Wiring
Examine the wire that is attached to both sensors. Make sure that there are no loose, frayed or disconnected wires. Replace or reconnect the wire as needed if damage wire is found.
3. Check Height with a Level
Both sensors need to be horizontally aligned and at the same height. By using a level make sure that each sensor is positioned equally on both sides of the garage opening.
4. Loosen and Adjust Sensor Brackets
Every sensor is fixed to a bracket that may be adjusted:
- Remove the screw or wing nut that keeps the sensor.
- Adjust the sensor until both lights become solid, which is typically red on the receiver and green on the transmitter.
- After alignment, gently tighten the bracket.
5. Align the Beams of Infrared
Verify that both sensors are pointing straight at one another, without tilting upward or downward. They must be in a straight line when the infrared beam moves between them. Especially in bigger garages, use a laser level to guarantee exact alignment.
6. Inspect the Sensor Lights
Most garage door sensors come with tiny LED lights.
| LED Light Status | Meaning |
|---|---|
| Solid Green (Sender) | Sensor is powered and transmitting |
| Solid Red (Receiver) | Sensors are properly aligned |
| Blinking Red/Green | Misalignment or obstruction detected |
| No Light | Power issue or faulty wiring |
Continue aligning the sensors until the LEDs are steady and solid if either one is flickering or not showing any light.
7. Test the Garage Door
After making sure the indication lights are solid and the sensors are positioned correctly:
- Test the garage door by repeatedly open and close several times.
- Make sure the garage door doesn't stop suddenly or reverse.
- Inspect the wiring and bracket tightness again if problems continue.
8. Check the Safety Reversal Function
Shut the garage door and then put a substantial item like a box, in the sensors' path. Once the beam is broken, the garage door supposed to reverse itself. This verifies that your safety sensors working properly.
Conclusion
Garage door sensor alignment is simple, but it's essential. This easy tutorial will help you fix typical sensor problems, get your garage door operating normally again and keep your home's entrance secure with timely garage door sensor replacement if needed.
A more serious hardware or electrical problem may be the cause if issues continue after adjustment. Making contact with a skilled garage door specialist is the safest course of action in that situation. Maintaining the proper alignment of your garage door sensors helps to the long-term dependability, security, and stress-free performance of your sensors system.